


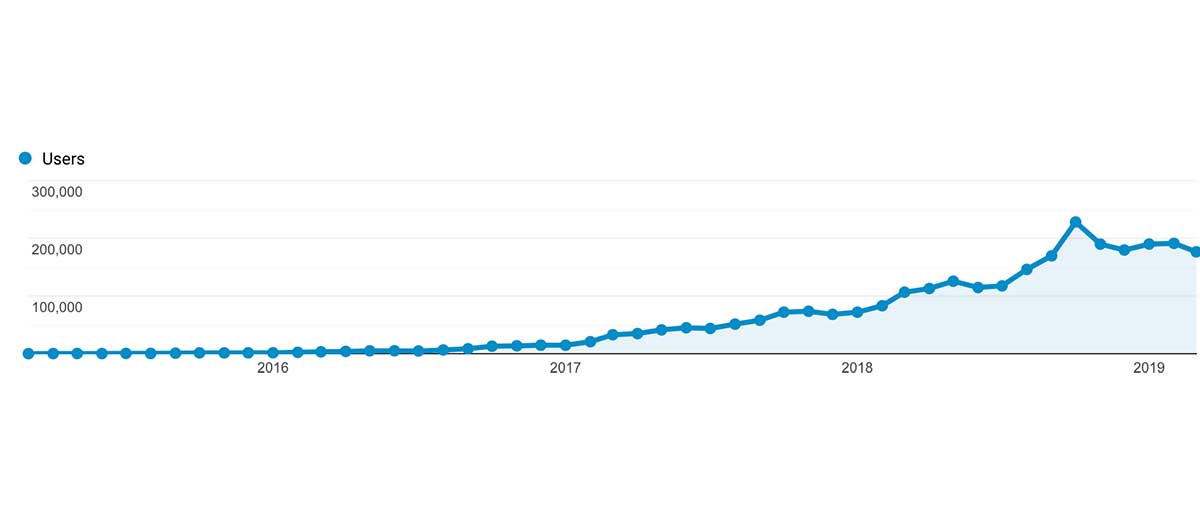
The secret to getting the most value from your content marketing is to keep re-promoting those articles that aren’t time sensitive. In this article, I explain how I re-promote blog posts on social media to attract new visitors and how you can do the same in five minutes per month.
Social media is a frequent traffic driver for a number of projects I am involved with. Between referrals from Facebook, LinkedIn and Twitter, we get daily visitors to our older articles on the 6Q blog. We do this through a habit of spending time every month setting up to re-promote blog posts.
In this post, I want to break down the five steps to getting your content read more frequently, and how I re-promote blog posts using mostly free tools.
The five steps to re-promote blog posts are;
- Curate all your articles into one list
- Write social posts, with variations
- Export and tweak your CSV
- Upload to Buffer in bulk
- Edit and schedule in Buffer
This looks complex, however you’ll quickly get into the groove and find it only takes 20 minutes per month to re-promote blog posts in bulk.
Let’s get into it!
Curate all your articles into one list
Before you even consider starting to re-promote blog posts, you need them all in one nice list. Since the 6Q blog is built on WordPress, we use the free plugin, List URLs for this purpose.
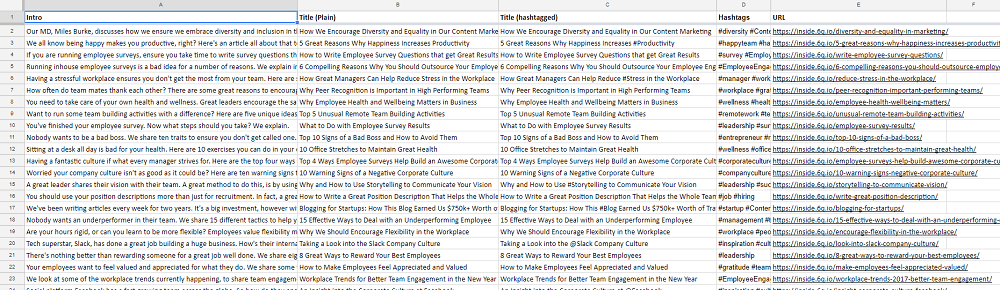
Write social posts, with variations
I add a few columns to this spreadsheet from the step above, and write a few different yet succinct descriptions. That way, I can schedule description #1 for all of the posts this time, and then description #2 next time.
For example, if I was writing descriptions for my Australian Digital, Marketing & Startup Conferences 2019 article, I would do something like;
Here’s my curated list of Australian tech and startup events across Australia. #startupaus #conferences
I recently published my list of 43 #startup, tech and #marketing conferences from across Australia. What will you attend?
My list of Australian tech, marketing and #startup conferences is constantly being updated. Know of one that I missed? Let me know!
Adding these in separate columns means my job in later steps is easier. Keep reading to find out why.
Export and tweak your CSV
Once you have your spreadsheet fully populated, it is time to export into a CSV. If you followed my step above, choose only one of the description columns, otherwise your social shares aren’t going to look pretty.
Make sure your columns are in this order to make it easier;
- Description (only one of them)
- Hashtags (if you haven’t tagged within content, like my example above)
- Full URL of the article
Once you have it all arranged, using Google Sheets, Excel or whatever spreadsheet software, and export and save as a plain old CSV.
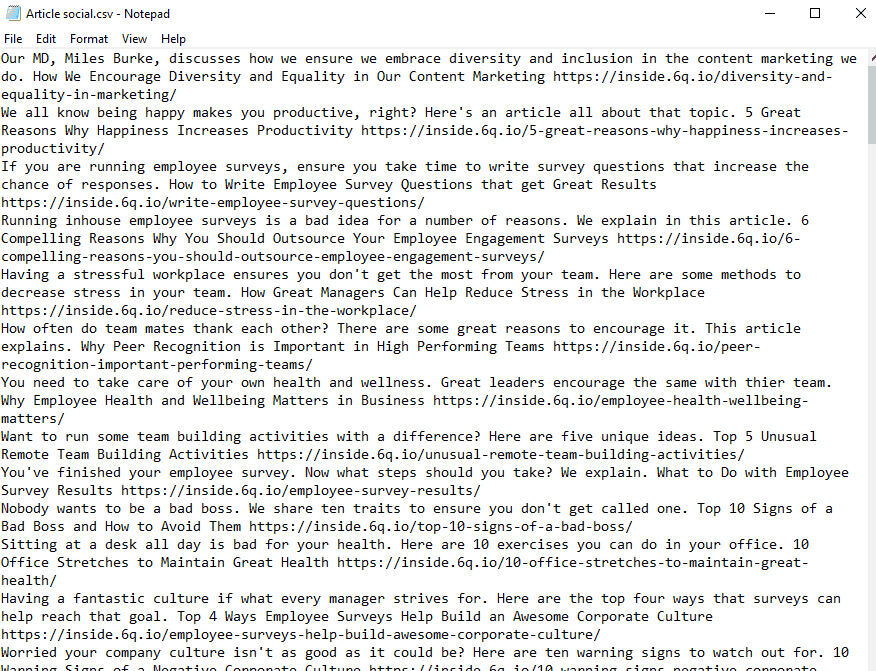
When it has been exported, you need to now open it in a plain text editor (not Word or fancy editor; I just use Notepad on PC) and search and replace the commas and other strange characters out.
Upload to Buffer in bulk
The only missing feature in my favourite social media scheduling tool, Buffer, has been solved by a third party. Best part is that it is free (although sending a donation to the creator, Luke Lanchester, would be greatly appreciated).
The aptly named Bulk Buffer makes very light work of adding up to 200 social posts at a time, straight into Buffer.
All you need to do is visit Bulk Buffer, connect it to your Buffer, and then upload your CSV or text file. Bulk Buffer allows up to 200 shares at one import, so if ou have more, you may need to break your imports into smaller files.
Once the importing has begun, you can just close the tab or window.
Edit and schedule in Buffer
Once Bulk Buffer has done it’s magic (thanks for that great tool, Luke!) I then go into Buffer, and check that my schedule looks tidy, and I tend to open each status, and tweak it so it looks great (adding para breaks, checking for weird characters, etc).
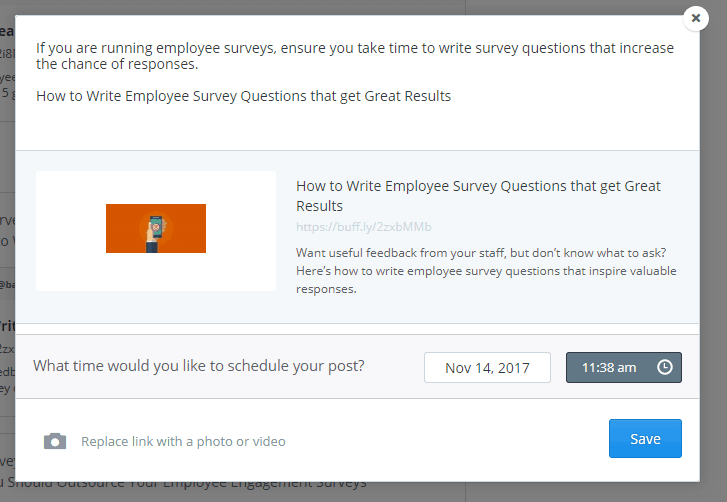
Bingo! My job is done. Depending on how frequently you share, you have a month or more of posts all in one go, and the best part is this takes 5 minutes a month when you’ve got used to the workflow.
In Summary
The trick to getting more readers to your blog is to make it a habit to re-promote blog posts using your social platforms.
The five steps are;
- Curate all your articles into one list
- Write social posts, with variations
- Export and tweak your CSV
- Upload to Buffer in bulk
- Edit and schedule in Buffer
Best of luck!